
Time to switch from the fugly frame thread( http://planetminis.com/forums/roost-area/175035-fugly-moto-parts-i-have-known.html#post1778357 ) to this one (if you want to see the pile o' shite this thing came from, check this link.) Having survived the angle grinder, welder and such, it has emerged a bit larger. The main tube is not done, and there are some gussets I am still going to put on, but the pics show what it looks like next to a K2 frame. I just test fitted a 14" tire, and it went on easily. So I tried a 16", and it fits as well. Looks wicked with the 16". The frame tube is 4" longer, and the frame sits about 2" higher. Decided to call it the 50 Magnum.
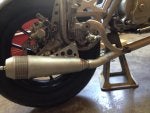
Edit: Some before and after pics. Watch this pile of rust become a complete bike.
Edit: Some before and after pics. Watch this pile of rust become a complete bike.